Pages

Wednesday, September 15, 2010

Tomato 'Anu' biata!

We had Tomato Arrabiata in a nearby restaurant and thought of trying it out. Here is my attempt to reproduce it in my kitchen. I have seen Arrabiata sauce in Nilgris, but I made it with the pizza sauce I had. Well it was not exactly Arrabiata but Anubiata!
Durrum Spaghetti - as required
Fun foods Pizza sauce - 2 tbsp
Pasta seasoning - 1 tbsp
Onion - 1 chopped
Garlic 7 or 8 pods chopped
Vegetables - 1 cup
(Carrot, cabbage - julienned), beans, cauliflower(parboiled in salt water), capsicum
Paneer - just 2 small cubes
Milk - 1/2 cup
Corn flour - 1 tbsp
Oil 1 tbspn
Salt as required

Boil 1 litre of water and add the spaghetti and salt as required. Cook till it is done, strain the water. In a kadai heat the oil, fry the onions, add carrot, beans and fry for couple of minutes then add the cabbage and cauliflower. Add 2 spoons of pizza sauce and keep frying. In the mixie blend together paneer, milk and add corn flour to it(This was not there in the spagetti we had, I wanted paneer in that). Add this and chopped garlic to the veggies. Add salt. Once the vegetables are just done, add the cooked spaghetti and the pasta seasoning. I dint add oil to the cooked spaghetti as we do for noodles as they were not sticking together. Toss for around 2 mins. Finally add the capsicum and remove from fire.

Wednesday, September 8, 2010

Glass Painting- 2

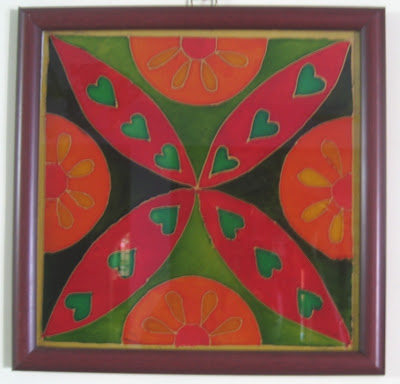
Glass Painting is not a difficult one, provided you have a good design and and you are able to get rid of the bubbles while painting.

It is not new to me. I did my first painting almost 2 years back. But never framed it. I had wrapped it with a paper and kept it in the loft. Now I have all the worlds time, I thought of framing it. OMG, the paper was sticking to the paint and I couldnt remove it at all. Now I learnt one important lesson about Glass Painting : You should never wrap it with paper and should use only cloth! Lessons learnt the hard way.

I had some left over paints and now that I painted the bottles, I started thinking of a complete painting. Finalized the design and here is my first framed Glass Painting.


Kuzhi Paniyaaram

I am using Kuzhi Paniyaara kal or chatti extensively for making Potato or colacasia(seppan kizhangu) fry. I also use it for shallow frying the appams(not the chettinad aappam). It has been long since I made the paniyaaram. So here it goes...

I made Kuzhi paniyaaram with Onion sambar and tomato chutney.

Par boiled rice(puzhungal arisi) 1 cup
normal rice- I dont know how to call it! (pacharisi) 1 cup
Urad dhall - 1/2 cup
Cooking soda - a Pinch
Curd - 1/4 cup
Salt as required
Chillies as required
Onion 1 big finely chopped
Carrot - 1 grated
Ginger- 1 inch piece finely chopped
Coconut pieces - 1 cup finely chopped
Oil for shallow frying the paniyaarams

Soak the rice for 2 hours and dhall for an hour. Grind them along with chilles, consistency same as idly batter. Let it ferment for a night. I ground the batter in the morning and used them for the dinner. Just while making the paniyaarams add the curd, chopped onions, ginger, carrot, coconut pieces and the pinch of cooking soda. Mix well. Heat the paniyaara chatti, pour just 2 drops of oil, yes, you heard it right. This is more than enough if you are using the non stick version of the kadai.
Pour the batter only till half of the kuzhi or pit. Wait till small pores appear on the surface of the batter. Use the spatula or spoon to turn the paniyaaram and let it get cooked on the other side also. Spongy Paniyaaram is ready!

There is a variation to this traditional paniyaaram. Grind some coriander and mint leaves along with chillies and add to one part of the above said batter. This will give you beautiful green paniyaarams. Make a pulp of a tomato, cook it for some 2 minutes along with some garam masala, chilly powder, turmeric and ginger garlic paste. Add it to the batter. This will give you orange paniyaarams. I have tried these, trust me they will look lovely and taste great!